Introduction to FragPunk
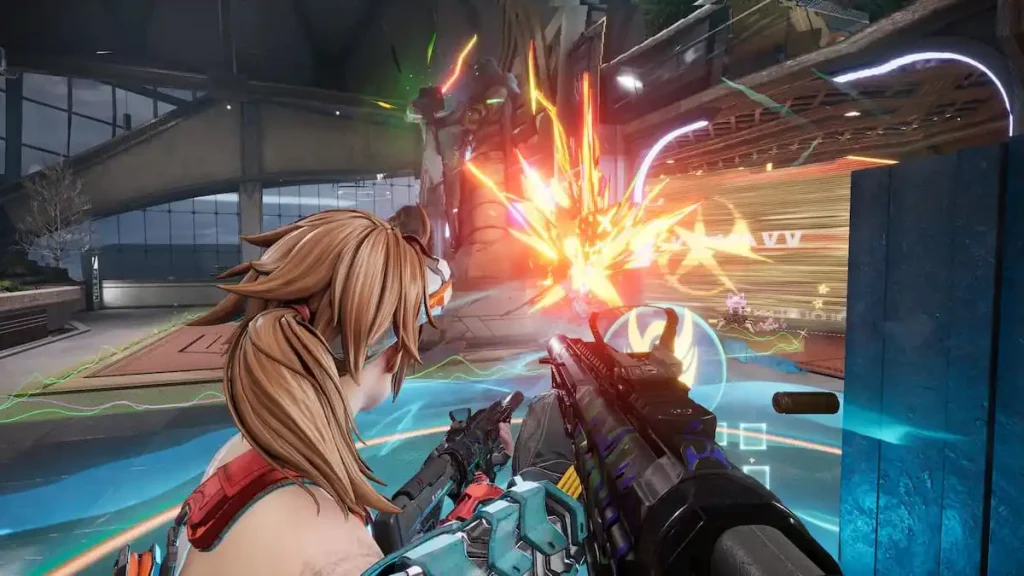
FragPunk is a tactical 5v5 shooter that borrows elements from popular titles like VALORANT and Counter-Strike, but with a unique twist. The game doesn’t involve earning and spending in-game currency to acquire weapons; instead, it limits the number of uses for each weapon category per side, whether you’re on attack or defense. This means that you might have to switch up your weapon of choice from one round to the next, adding an extra layer of strategy and adaptability. Whether you’re a seasoned player or new to the genre, understanding the best weapons in FragPunk is crucial for maximizing your performance and contributing effectively to your team.
Weapon Selection and Team Dynamics
In FragPunk, the choice of weapon isn’t just about personal preference; it’s deeply intertwined with your team’s strategy and the Shard Cards you use. For instance, Shard Cards that reduce headshot damage can significantly impact the effectiveness of marksman rifles, making weapons like the Bad Reputation less viable. Conversely, weapons with high body shot damage, such as the Fever, become even more powerful in such scenarios. Additionally, the limited use of weapon categories means you must be versatile. Even if you’re a fan of assault rifles, you’ll need to be prepared to use other weapons in certain rounds. This dynamic encourages players to develop a broader skill set and adapt to the ever-changing battlefield conditions.
S-Tier Primary Weapons
The S-Tier primary weapons in FragPunk are the elite choices that offer the best combination of damage, control, and versatility. Fever is a top-tier rifle that stands out for its high damage and fire rate. Comparable to the Vandal and AK-47 in other shooters, the Fever is a powerful weapon capable of taking down enemies with just two headshots. However, its high recoil requires skillful management, making it a favorite for players who can handle more challenging firearms. Discipline, on the other hand, is a lighter rifle with minimal recoil. While it deals less damage, its sprays are highly effective for mid-range engagements. Discipline is an excellent choice for players who prefer a more stable and precise shooting experience, regardless of the Lancer they’re playing. Both these weapons offer distinct advantages and are essential for a well-rounded arsenal.
A-Tier Primary Weapons
The A-Tier primary weapons are solid choices that can often tip the scales in your favor, especially when used strategically. Resolver is a high-caliber sniper rifle that, while not a one-shot wonder at all ranges, remains a formidable option. It deals 130 damage from 17 to 60 meters, making it a solid choice for long-range engagements. However, its lack of a one-shot kill capability at longer distances is a significant drawback, placing it just below the S-Tier. My Way is a close second to assault rifles, offering a similar fire rate to Discipline but with higher damage and increased recoil. It’s a versatile weapon that can fill the gap when assault rifles are unavailable. Bad Reputation is a marksman rifle with outstanding long-range capabilities. It delivers 132 damage to the head from 15 meters, requiring only two shots to eliminate an enemy. This makes it ideal for players who prefer to stay in the backlines, providing support with precise, high-damage shots. Lastly, Boom Broom is a fully automatic shotgun designed for close-range encounters. Its high rate of fire and damage make it perfect for corner camping and quick, decisive engagements. Pairing it with damage over time or revealing utilities can further enhance its effectiveness.
B-Tier Primary Weapons
The B-Tier primary weapons, while not as dominant as their S and A-tier counterparts, can still offer unique advantages in the right situations. Highlife is a lightweight sniper rifle that demands precision. One headshot or two body shots can secure a kill at any range, and it’s even possible to get away with one body shot at distances up to eight meters. However, its hip-fire accuracy is significantly lower compared to scoped shots, making it less forgiving than the Resolver or My Way. Clampdown is a submachine gun tailored for extremely close-range encounters. Beyond 10 meters, the damage falloff and increased recoil make it less reliable. This weapon is highly situational and best used for defending tight spaces or clearing corners. Mad Dog-S is a budget alternative to Discipline, offering a faster fire rate and slightly higher recoil. With 25 rounds in the magazine, it’s a versatile option for players who need a reliable submachine gun but don’t have access to assault rifles. While it’s not as powerful as the S-Tier weapons, it can still be effective in the right hands.
C-Tier Primary Weapons
The C-Tier primary weapons are generally less effective but can still be used in niche situations. Bad Moon-S is a marksman rifle with a higher fire rate but lower damage compared to Bad Reputation. While it’s possible to make it work with excellent accuracy, the superior performance of Bad Reputation and the reliability of assault rifles often make it a lower priority. Ghost Pepper is a machine gun with a small wind-up time, which can be a critical delay when an enemy suddenly appears. Despite its decent damage and range, the wind-up time makes it less appealing for spontaneous engagements. Meat Maker is a pump-action shotgun that can be a powerful tool in the hands of a skillful player. However, there are few situations where it’s the best choice, as other shotguns like the Boom Broom or submachine guns like Clampdown are usually more effective. These weapons can be useful when you need to adapt to a specific playstyle or team strategy, but they should be chosen carefully.
Best Secondary Weapons in FragPunk
Secondary weapons in FragPunk are crucial for providing additional utility and flexibility. The S-Tier secondary weapons, Blaster/Flasher/Smoker/Burner, are utility pistols that offer both a regular firing mode and an alt-fire mode to launch projectiles. These weapons can be used to disrupt enemy positioning, create smoke screens, or deal damage with incendiary effects. The choice between them often depends on the specific needs of the round, but they all provide valuable utility beyond just shooting. In the A-Tier, Cure-All is a versatile pistol with decent range and damage, similar to the Classic or Glock-18 in other games. It’s a reliable choice for players who don’t need the extra utility provided by the S-Tier weapons. Vicious, also in the A-Tier, is a high-damage secondary with a slow fire rate, akin to the Deagle. Its lack of recoil and crosshair displacement make it easy to spam shots, but it requires precise aiming to be effective. Finally, the B-Tier Cold Shoulder is a fully automatic secondary weapon designed for close-range encounters. Despite its low damage, it can be useful for defending tight spaces or executing specific game plans that involve close-quarters combat.
Conclusion
FragPunk’s unique weapon system, which limits the use of each weapon category per side, adds a strategic depth to the game that sets it apart from its counterparts. Whether you’re a fan of high-damage rifles, precise snipers, or versatile shotguns, there’s a weapon in FragPunk that can fit your playstyle. However, the game’s dynamic nature means you’ll need to be flexible and adapt to the tools at your disposal. By understanding the strengths and weaknesses of each weapon, you can optimize your loadout and contribute effectively to your team’s success. Whether you’re using an S-Tier weapon like the Fever or a C-Tier weapon like the Meat Maker, the key to victory lies in strategic weapon selection and skilled execution.

